Photographing Water & Waves
Getting in the water and shooting is one of my favorite things to do. Let’s cut to the chase. Step one: Get yourself in the water. Step two: shoot. Simple enough, right?
Hands down, one of the best pieces of gear you can purchase to improve your photography is a pair of waders. They allow you to walk right into the ocean or plant yourself in the middle of a river. Confident that you’ll stay warm and dry, a world of compositional opportunities open up. When I’m not wearing them my waders are nearly always either in my vehicle or strapped to my backpack. At the beach or in the river, having a pair of waders allows you to literally have water rushing around you. Not only is it a thrilling experience but you can fill the bottom of your frame with water. And I mean fill.
You simply won’t be able to take an image like this unless you’re willing to get wet, throw fashion to the wind and wear waders, or you’re really, really fast.
Before we focus our attention in this article on the beaches of the wild coast in Washington’s Olympic National Park, there’s an added bonus to having a pair of waders. Several, actually. On my first trip to Olympic, I didn’t quite realize that there would be water crossings - on the beaches themselves - from creeks making their way out of the rainforest and ending in the Pacific Ocean. I saw a number of folks turn back. While others were looking for a place to jump, I just stomped on through. No need to break stride. Not as surprising, some of the trails down to the beaches can get a tad bit muddy in the overcast and rainy Pacific Northwest. Instead of needlessly contributing to the widening of a trail to avoid the deepest mud, once again, I can stomp right through the middle of the mud when equipped with my trusty waders. Kind of fun and you feel like a badass when everyone else is trying their best to not get muddy. A quick romp in the ocean (or creek) after I hit my chosen beach and I’m cleaned off. So even in scenarios where you won’t be shooting in water, having them available to hike in can get you to other areas that might otherwise seem impassable. I’ve done this in the mountains of Colorado - especially in the spring. Plus they’re great in the snow as well. They’re waterproof and, coupled with some extra layers underneath, toasty.
Now about that shooting. This is the fun part.
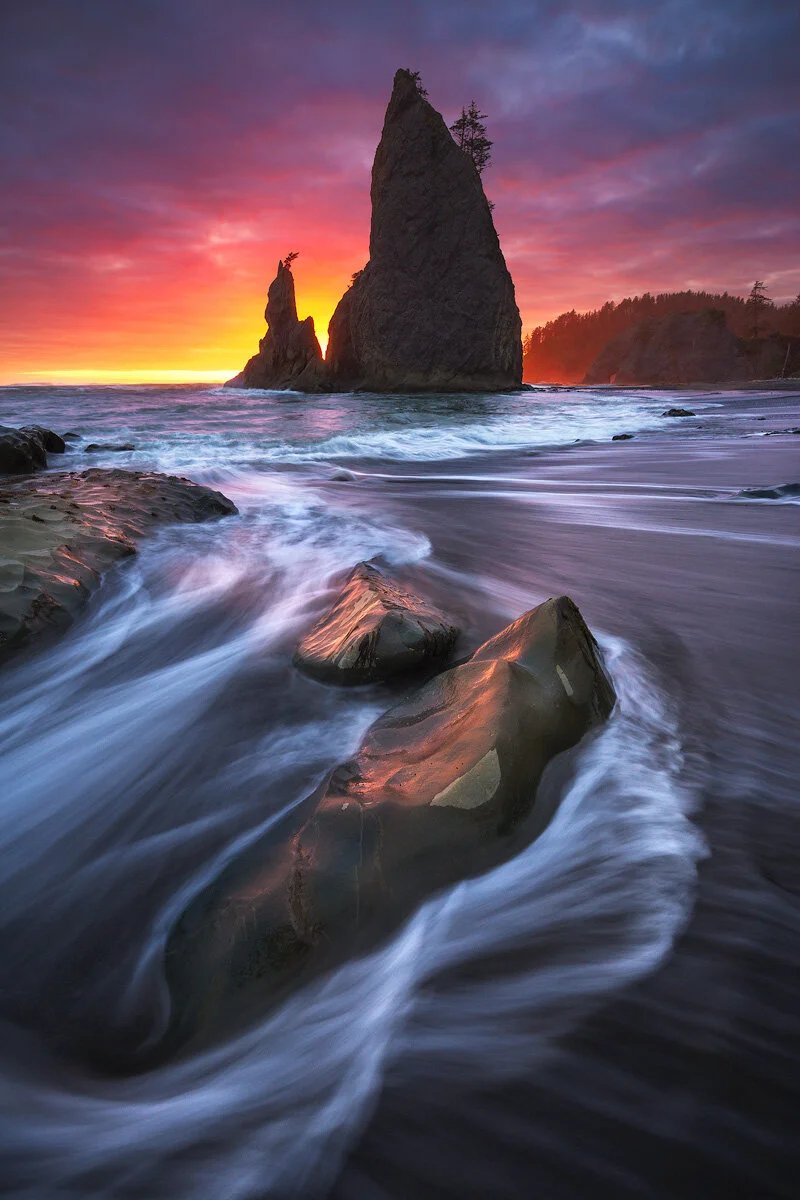
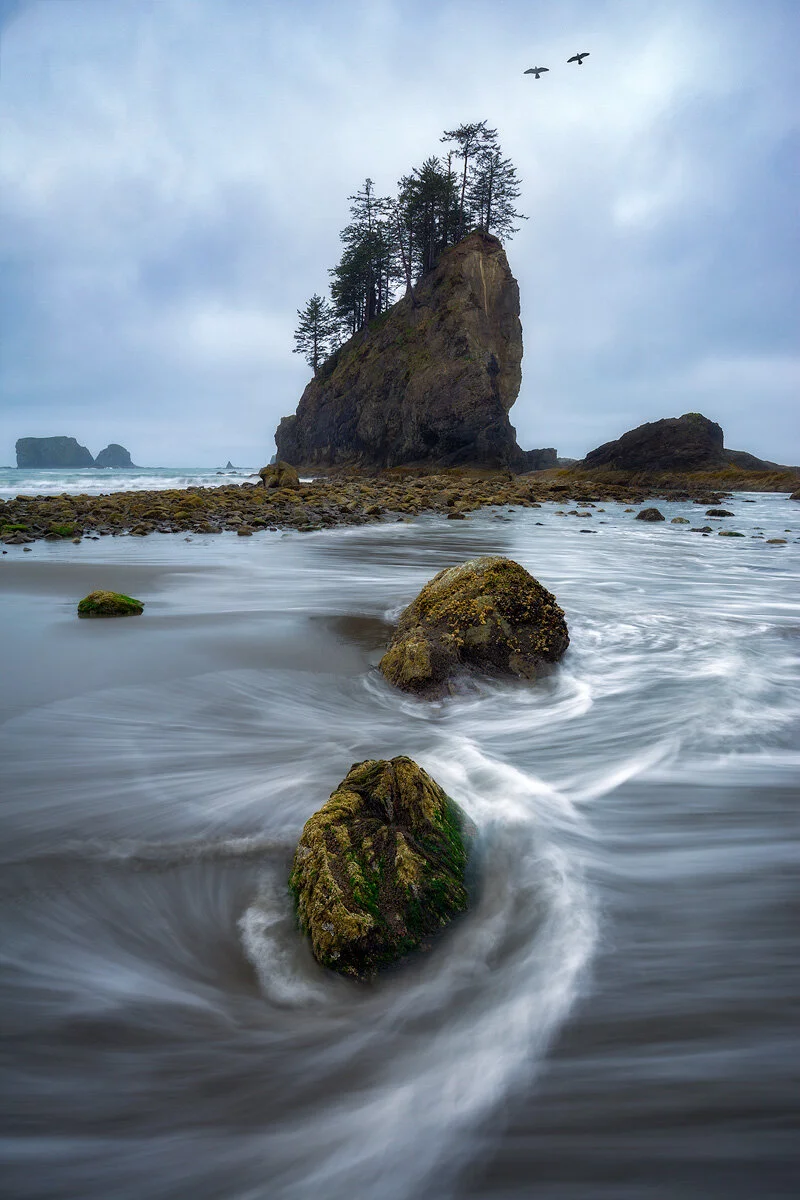
Choose your composition wisely. I like to use natural features such as rocks to add foreground interest and to channel the water and create leading lines originating from the edges of my frame. If you have a rising tide and you’ve picked out a killer foreground, then relax and wait. Enjoy watching the tide get closer and closer. For the image above and the image below, I did exactly that. I picked out the foreground rocks. I knew that the tide would eventually reach them. And I waited until it did. You’ll generally have a short window of time where there’s just enough flow to make things interesting. To me, that’s the sweet spot and where you want to start shooting. If you’re running around shooting various compositions, you very well could miss it entirely. As the tide continues to rise, you’ll get more of a wave effect as the water gushes over the entirety of the rocks. Not a bad thing at all. Just different and the rocks are no longer visible. As a general rule I start to rise my tripod as this occurs so as to not give myself and camera a drenching that even waders won’t save me from.
If you’ve given yourself enough time to scout, you can have more than one area picked out. When your first comp is completely covered in water, simply move on back to the comps higher up on the beach to restart the process.
Of course it’s helpful to know the tide prediction of the location you’re shooting. There’s no doubt that some beaches are best at high tide while others are best at low tide - or somewhere in between. Then there’s a bit of an art to lining up a given tide with a particular golden hour. First hand experience or a guide is indispensable here. So initially it can be hit or miss learning which tides and times are best for particular beaches when you have a certain composition in mind. Don’t let that process frustrate you. If, for example, you end up on a beach at low tide and you can tell you need something higher, put less emphasis on shooting. Simply enjoy the moment. Scout a little if you’d like. You might surprise yourself as you detach from the internal pressure to take a shot.
Multiple frames means multiple options in post-processing.
I generally shoot between 1/5 of a second to 1 full second. I tend to prefer the lower end of that range. Why? I like to keep details in my water. Keep in mind that faster shutter speeds freeze action. Above 1 second, water tends to smooth out too much for my liking. In order to achieve the sweet spot, it takes some trial and error. However, since we’re in a dynamic environment and I don’t want to be staring at the back of my screen while a gigantic wave is sneaking up on me, I simplify the process and take multiple frames of varying shutter speeds within the range. I plan on reviewing them in more detail during post-processing. Of course take a look at what you’re doing from time to time. Just note that what looks great on the back of your camera might look vastly different blown up on your computer.
Different parts of a scene can require different shutter speeds. Let me explain. Since we’re talking fractions of a second here, the entire wave cycle may not complete in one frame. By taking multiple frames without moving your tripod, you grab flow starting and ending at differing points throughout each of the frames. Later on you can blend in selected parts of an image based on your vision. I call this “blending moments in time.” And, let me tell you, blending water is easy. No special techniques involved in that and I find it to be one of my favorite things to do in post. Going back to the first two images above, I used this in each of these. Can you tell?
On the ocean, when it gets really good and water is flowing all around you, shoot all the way through a wave. Setting your camera’s shooting mode to a continuous or burst mode can be helpful here. A remote trigger is a smart idea as well to further reduce camera shake. I prefer the wired versions as I’ve found them to be more reliable than the wireless ones... when they’re not waterlogged. Since you’re playing in water be cognizant of where it hangs. I’ve learned that the hard way and have lost many a remote triggers to not paying attention when sitting low to the ground. When this happens I go with a 2 second time delay. Not ideal since you can’t take as many shots through the course of a wave, but functional under the circumstances. These days I carry multiple remote releases with me at all times.
As a rule of thumb, water tends to look better receding; however, that’s not always the case. Water motion depends on a lot of factors out of your control such as wind, surface, obstacles, etc. I always recommend shooting way more than one wave or two per composition as water can be so dynamically different from frame to frame. The first image above was shot as the tide receded. The second was an approaching tide.

I was hoping to capture a whole bunch of water flowing in and out of here. Didn’t happen. But I couldn’t have cared less. Be flexible and work with what you’ve got.
Always be prepared to completely break the rules. Especially when you have slow moving water. I’ve required a 4 second exposure to get some bubbles to move around and create something interesting. I’ve used a neutral density filter and a 3 minute exposure to smooth out a river. Remember these kind of results can only realistically be achieved in the field. There’s no amount of Photoshop wizardry that can rival the beautiful results of long exposures of rushing water.
Don’t forget about your background and other elements. When there’s a lull in the action or better yet when the light is going off back there, make sure to grab some clean and properly exposed shots of your background and sky. If you have any other elements that might be swaying in the breeze, such as foliage, make sure to adjust shutter speeds appropriately (translation: faster ones) to make sure you’re grabbing some sharp frames of them as well to blend in later.
A few additional tips:
Keep the front of your camera lens clean. When you’re in a really wet environment or one with mist present, there’s nothing worse than having water spots build up on the front of your lens. While you think you’re crushing it, you might just be taking a whole bunch of useless frames. Check often. Use some wipes. I use these. I also use a shower cap to throw on the top of my camera body and lens. In super wet environments, I’ll wipe down the front lens element first, get in position, and then rip off my shower cap and fire away.
Make sure to have a sturdy tripod that can withstand pounding water. When I’m at the beach I like to replace my tripod feet with spikes that can push deep into the sand. This further prevents any unnecessary movement resulting from approaching or retreating water. I can’t recommend Really Right Stuff tripods enough. They sell the spikes as well here.
Last but not least, use common sense. Observe before entering. I’ve been waist deep in a rising tide before deciding that enough was enough. There’s nothing wrong with moving back and using the natural reflectivity of wet sand along with disappearing pools of water to your advantage. It’s quite divine. Use that as a opportunity to shoot reflections as well as a natural way to clean up messy beaches or footprints.
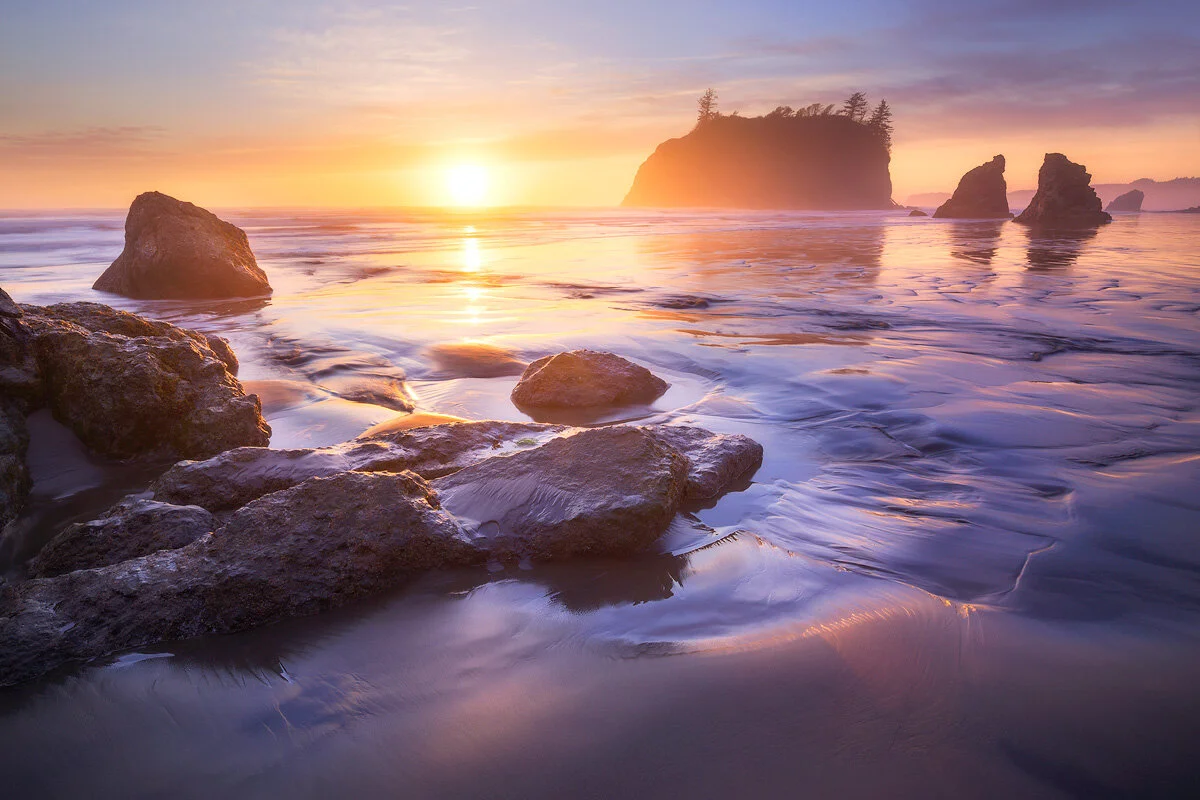
Moments prior I was further up standing in between these rocks with the water up to my waist. Moving back was the better idea for a multitude of reasons.
Any questions? Reach out. If you’d like to learn these techniques and more in the field with me, consider joining a workshop or a signing up for a private lesson. Just make sure to come prepared with a pair of waders.