Blending Moments In Time
A picture can never really do it justice. As we often say, you just had to be there. This world we share is so utterly complex yet cohesive on levels we as humans may never come to understand. So of course an advanced piece of technology made by man, albeit a pretty dang awesome one, can’t touch the real thing. But me and my camera try our best. My interpretation of experiences spent outdoors translated into a two-dimensional medium of art is best expressed in a technique called Time Blending. This is where multiple frames of a scene are taken over a period of time and blended together to create one single image. I use this technique often enough such that it has become a regular in my arsenal. It’s one of my absolute favorite things to do while in the field. It allows me to express more of the feeling of actually being there.
Let me set a scene. You’re in nature. In some corner of paradise you can’t hardly believe exists. You may have done a good deal of hiking. There are some tired legs. You have found a composition you’re thrilled with. You no longer want to bounce around. Your camera and tripod are all set up. All you need to do is wait for the best light. After resting to enjoy the bounty all around you, it’s beginning to get late. The sun is about to set. What am I doing? I’m generally shooting from the bottom up, or foreground to sky. As the sun sets, you’ll lose light beginning at the bottom of your frame as shadows start to fall on the areas of lower elevation. Your background, such as a mountain peak, and sky will likely showcase their best further into the sunset hour. For sunrises, I do the opposite. I shoot from the top down, or sky to foreground, as the light starts high and falls down through your frame. This is, of course, simply a rule of thumb. Don’t always follow the rules.
Here’s an example from Bisti Badlands in New Mexico:
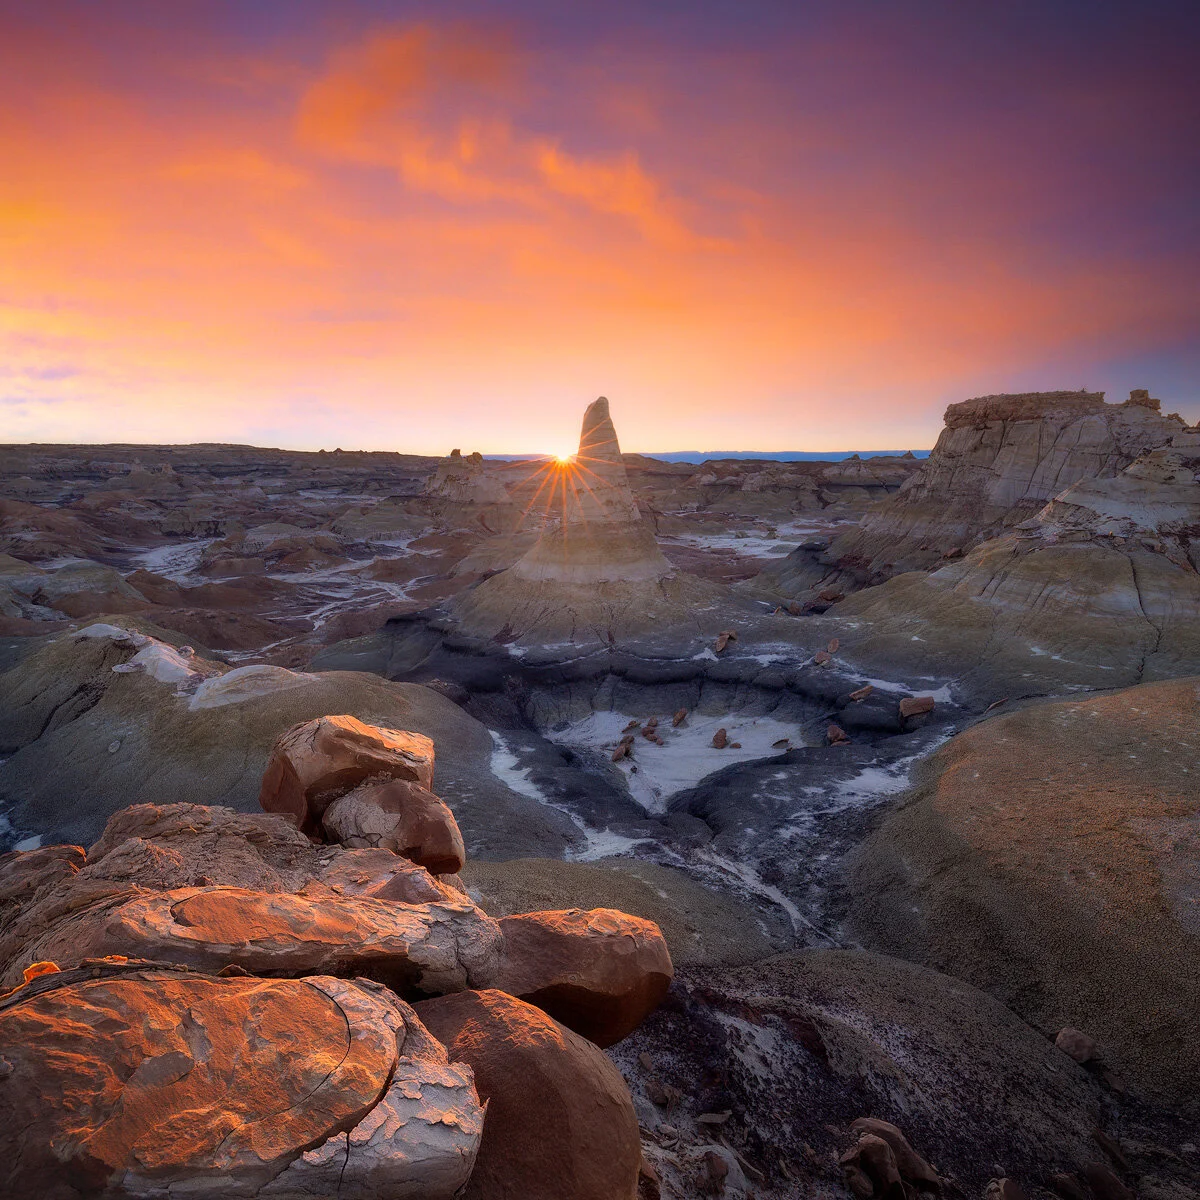
Capture the last light or the sun star? Let’s go with both.
This is made up of two main images plus additional images to combat lens flare and improve dynamic range. I often enjoy setting up with a foreground element quite close to the camera. One image was taken as the final light hit the foreground rocks. By setting my focus on this area and grabbing this frame, it has the two-fold effect of not only grabbing the last light but also having a frame where those rocks were sharp and in focus - thereby ensuring full depth of field from the foreground through the background elements. After that light was gone, I set my focus for the main hoodoo you see in the middle of the frame. I then waited for the sun to reach the horizon to create the sun star effect. These two events happened less than 45 seconds apart. It’s important to adhere to the direction of light. And that’s easily accomplished by not moving your camera and/or tripod. In post-processing, I blended these two images, bringing together my favorite bits of the evening. Its a bit like filming an experience in a single image. Patience pays off in these instances.
Let’s look at another example from Olympic National Park in Washington:

When you’re ready to be more creative and less literal, long exposures can be blended with frames that freeze the action to express a dynamic range of an experience.
On an overcast day, we didn’t get a fiery sky, sun star, or, quite frankly, any interesting light. We had a couple other elements of interest though: a rising tide and birds flying into the scene. There’s no way you could capture birds in flight while also getting a long exposure for the water in a single frame. The birds require a fast shutter speed while the silky water is only achieved with a slower shutter speed. See my guide to photographing water and waves here if you’d like more information on that topic.
Anyways, I wanted to capture the full experience of being there: the water flowing around me and these rocks, as well as the birds flying overhead. When I initially tried something like this, I was all excited. Then when I reviewed the images, I noticed that I could nail the water exposure; however, the birds were tiny, blurry dots or lines. Not exactly impactful. I chalked it up as a learning experience and changed my approach the next time around. I’m not going to say what the exact settings you need because it’ll depend on shooting conditions, but you’ll certainly need a significantly faster shutter speed to freeze the action of flight. Of course, this doesn’t jive with long exposures of water. Instead of choosing one or the other, I choose both. How? I bust out my telephoto to grab shots of the birds separately, trying to get their size perspective closer to what I was seeing in real time. With overcast skies and even lighting, I spent some unhurried time dedicated to capturing handheld images of the birds in flight as they circled the sea stacks. Then when the tide started rolling in, I grabbed the long-exposure frames of the scene in front of me, making sure to grab multiple frames for the water as it changes constantly. With an artistic touch, I blended my favorite moments.
Here’s our last example from Crested Butte in Colorado:

Reflect on what you ultimately want to accomplish. Start putting the pieces together from the get-go.
This was an interesting one and a lot of fun. A lackluster sunrise was followed by this dramatic light breaking through the clouds as the sun kept rising. All I had to do was stay put and wait. Over the course of a little over two minutes, the light moved from left to right, and I ended up blending four of my favorite frames. In post, I auto-aligned the files and focused on blending sections of the mountain, reflection, and sky to my heart’s content. The experience was of seeing this light move across the entire face of the mountain, which was not embodied by one split second of a single frame. As I look at this image, I’m reminded as close as possible to the feeling of being able to witness this special moment.
These are but a few examples of this technique in action. The possibilities are endless. This particular technique feels a bit like painting with light real-time while in the field. Outside is where I most like to spend my time, so this doesn’t come as a surprise that I like to make the most of my imagery in-frame. However, since you’re capturing and combining multiple transitions of light or elements over a period of time, the harder and less enjoyable part for me comes in the post-processing chair. It generally gets more difficult as the exposures are spaced further apart. If it’s a matter of seconds or a couple of minutes, usually no big deal. If it spans 20 or 30 or more minutes, it can get a bit trickier. So even though these are some of my favorites to create, they take a bit more patience and tedious blending in post-processing to bring about a seamless result. But when they work, they can really take things to the next level. So take your time. Enjoy yourself out there.